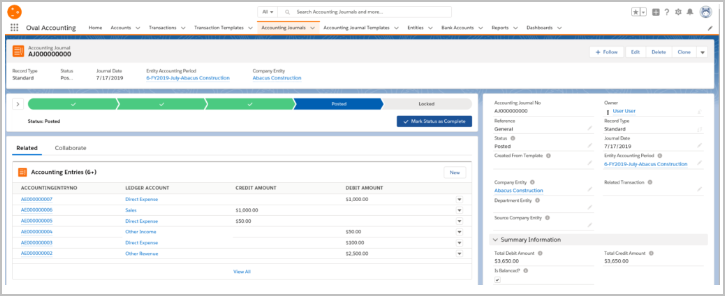
The Accounting Journals tab is where the Journals can be added for your Company. In order to do this, follow these steps:
- Navigate to the Accounting Journals Tab in Oval Accounting.
- Click on New.
- Enter a Reference for the Journal.
- Select a Status from the dropdown.
- Enter the Journal Date.
- Search for an Accounting Journal Template if one is to be used ( See Accounting Journal Templates help).
- Search for the Entity Accounting Period. Enter the Company Entity, Department or Source Company Entity details.
- Search for the related Transaction.
- In the Additional Information section you can enter Document Reference, Description and also select the Automation Rule that applies for this Journal (if relevant).
- Click on save.
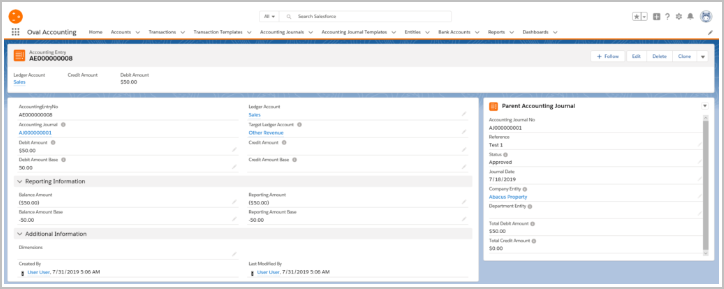
The Accounting Journal has now been created. You can now add Accounting Entries.
- Click on New Accounting Entry.
- Select the Ledger account applicable to the Accounting Entry.
- Select the Target Ledger Account.
- Enter either the Debit or Credit amount that this entry applies to.
- Click on Save.
The Accounting Entry has now been created along with the Reporting Information being populated.

Keep adding as many Accounting Entries as is required until the Journal is complete. Once it is complete , the ‘Is Balanced?’ checkbox will be set to TRUE if the Journal balances. You can then use the Kanban to change the Status as required.

End of Article.